
This document will detail how to replace a Y bearing.
You will need a 3 mm allen key and the appropriate bearing (MSB15SSSFCN), and optionally a 3 mm T handle allen key.
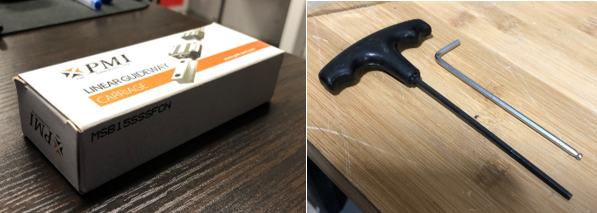
The T handle allen key is just to loosen any tight screws you cannot loosen with the allen key.
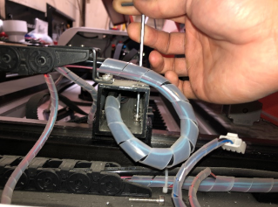
We will need to remove the entire X bar from the bearings to replace one or both bearings, as the X bar is screwed in directly into the bearings. To remove the left side screws, we will first need to remove the mirror on the X bar.
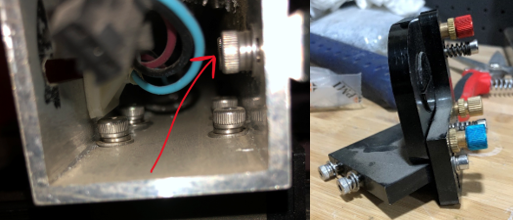
To remove the mirror, you must remove the side screws inside the X bar. Use the T handle to loosen if they are too tight.
Once the mirror is removed from the x bar, you must also remove the pulley on top of the X bar, as it blocks the access to the screws holding the X bar and the bearing together. You will need to loosen the x belt to aid in the removal of the pulley.
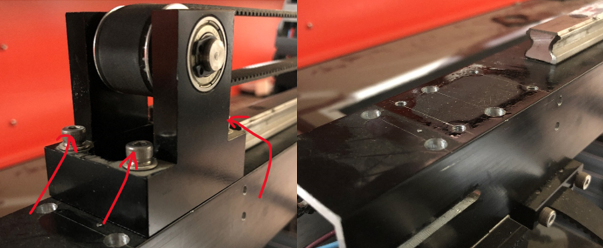
Once the screws are removed from the pulley assembly, the access holes are uncovered.
You can now remove the screws to remove the pulley. Use the access holes to remove the screws. The T handle might need to be used to loosen the screws.
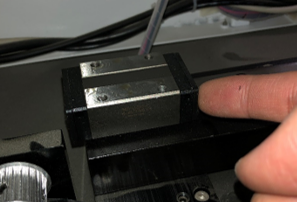
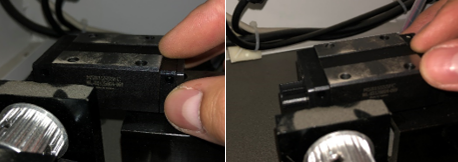
The screws will need to be removed from the bearing.
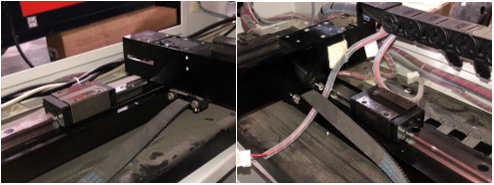
On the right side, the motor mount will need to be removed to access the screw holes as well. The picture below details the screws that need to be removed. Make sure the belt is loose to remove the motor mount.

Once the screws are removed, the access holes will be visible, just like the left side.
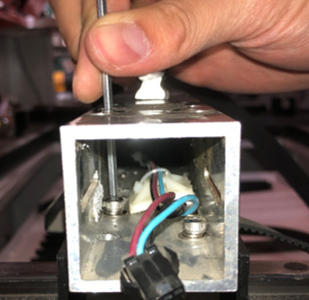
Now remove the screws as shown below. Again, a T handle might need to be used to loosen the screws initially.
All 4 screws need to be removed. Move the wires accordingly.
Once both sides of the X bar have the screws removed, you will now be able to remove the X bar completely from the Y bearings.
Now both the left and right side Y bearings should be free to be replaced by the new Y bearing.
Once the bearing is free to move, you may slide it off easily from the rail. The bearing is skinny enough to slide off without hitting anything.
The bearing should slide easily and can easily be removed.
The next step will be to slide on the new bearing. Note that on the new bearing, there is a plastic piece holding the ball bearings in place. You MUST NOT remove the plastic piece until you slide the new bearing onto the rail.
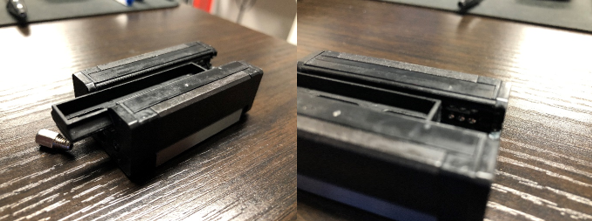
As shown in the picture, you can see the ball bearings in the picture on the right.
When sliding the bearing onto the rail, be sure to push the plastic piece out as the bearing moves forward onto the rail.
As the bearing is pulled onto the rail (towards the right), the plastic piece will slide off.
Once the bearing is replaced, you may start the reassembly process. Be sure when screwing in the X bar to both y bearings, that the X bar is 90 degrees (perpendicular) to the bearing, so that the X bar is straight.
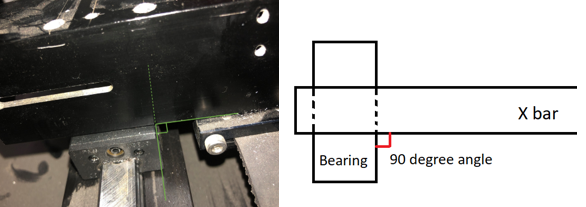
As shown in the picture, the X bar needs to be perpendicular to the bearing.
Once the X bar is attached to the bearings, you can now proceed to do the reverse and re screw the motor mount and pulley mounts. Be sure to re-tension the belts.