
This document will detail how to replace the new power supply with the old power supply.
When swapping to the old power supply, be sure to have the following:
- Ratcheting terminal wire crimper tool.
- 3 fork connectors
- Small Screwdriver
The first step will be to move the wires up one slot. As shown below, the older style has the 5v slot at the bottom, whilst the newer style has it at the top. Thus, the wires would need to be moved up a slow to be in the correct position for the old power supply.
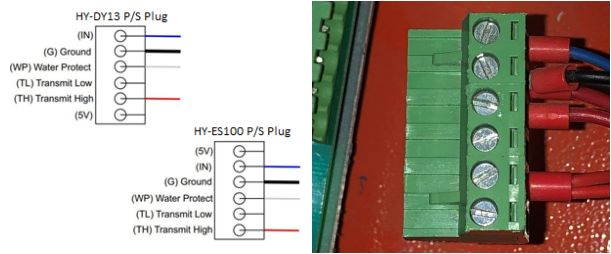
When going from the power supply to the older power supply, the wires will need to be move one step up in the green connector.
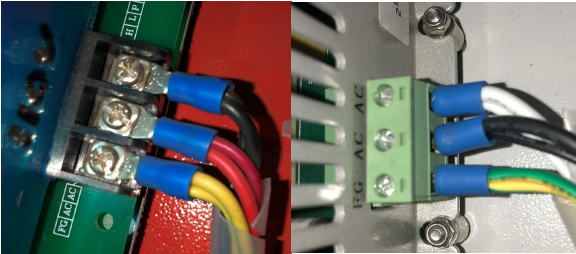
For the AC lines, old power supplies have fork connectors, and the new power supplies have ferrule connectors.
The next step is to covert the AC ferrule connectors into fork connectors. To do so, you will need to cut off the ferrule connector and strip the wire. This will allow you to crimp the new fork connectors. First, cut the AC ferrule connectors to start with a fresh set of wires. Next, strip the wires to reveal the wiring.
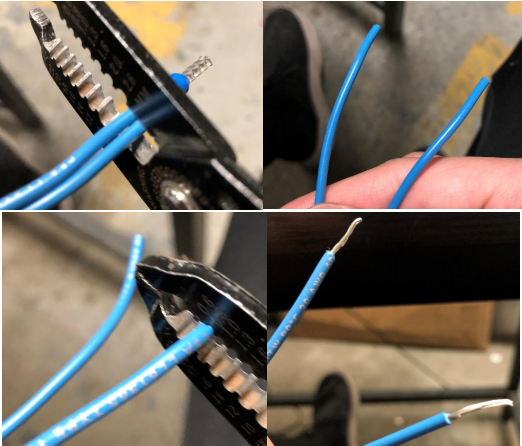
This is the process to cut and strip the wires.
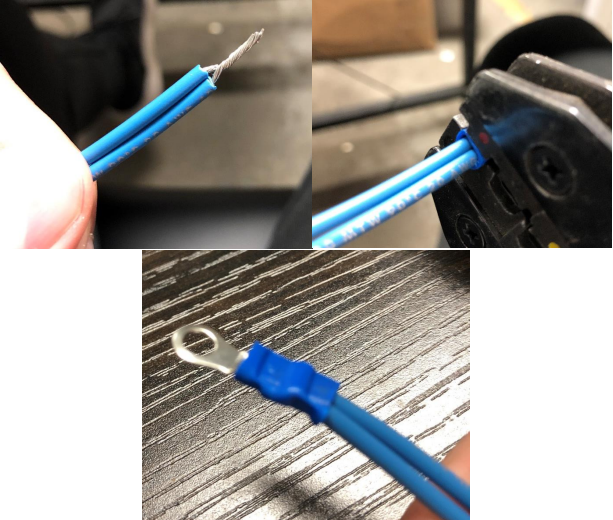
Next twist the wires to combine them into a single strand. This will allow you to crimp two wires into one. Next, put on the fork connector, and crimp it using the terminal ratcheting crimper tool, on the furthest spot (red diode). The crimp should be complete. Tug the wires to ensure that the crimp has been completed thoroughly.
In this example, a spade connector is used, however, it is the same process as crimping a fork connector.
Now it is a simple as putting the AC lines back into the old power supply.