
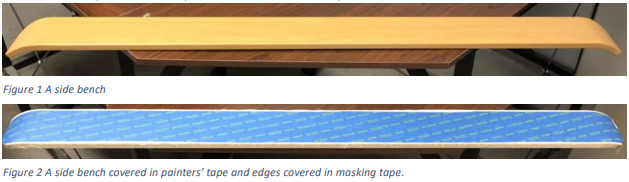
Process for engraving a bench with the CO2 laser machines.
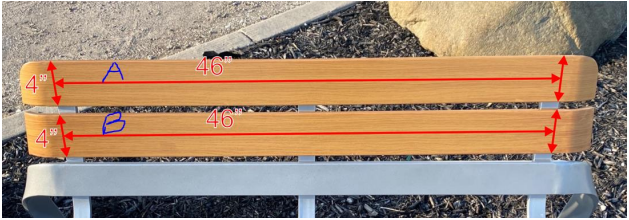
When engraving on benches we need to do A side and B side. There is a sticker with a letter on the back of the bench which indicates what bench it is.
To set up a bench you must follow these steps:
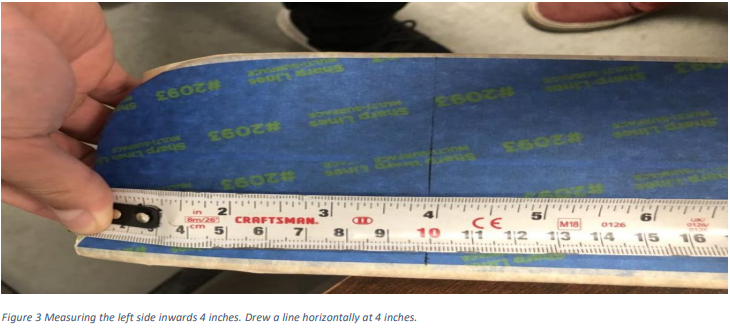
- Tape the middle of the bench with painter's tape (typically blue or green) and tape the outside of the bench with regular tape. You should make a small overlap with the tape to ensure that the paint won't touch the bench.
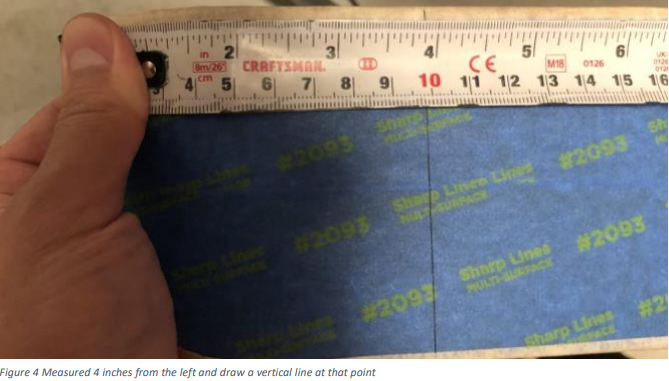
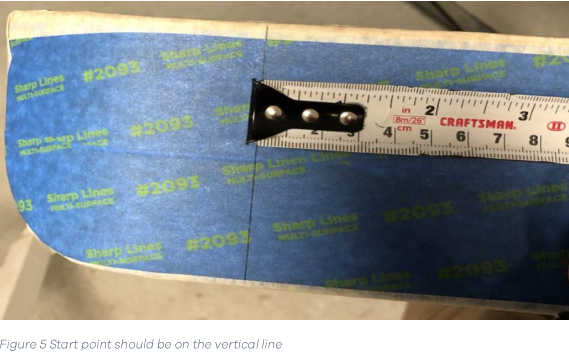
- Measure from the very end of the bench about 4 inches inward and make a line using a level/ruler.
- Repeat step 2 for the right side.
- You should measure from the left and right vertical lines a total distance of around 42.5 inches.
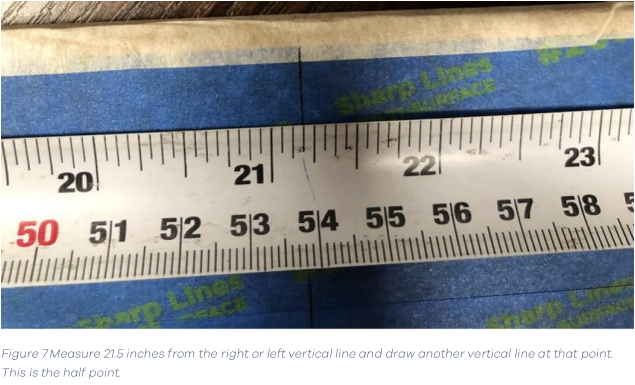
- From a vertical line measure about 21.5 inches and draw a vertical line there. This should be about half the distance between the vertical lines.
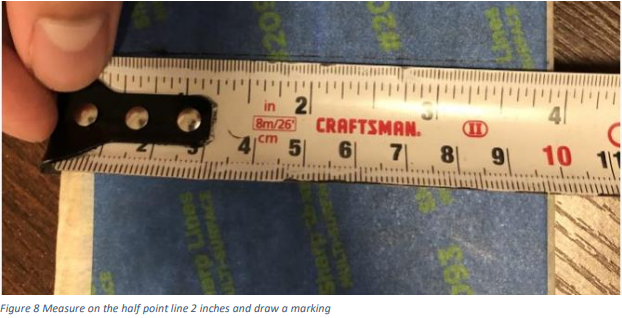
- Measure vertically on the middle point 2 inches and draw a line/marking at that point. this is the half point of the bench.
- Draw a circle around the middle point to make it visually easier to spot the origin when lasering the bench.
- Place the bench on the laser machine. Ensure that the bench is in the proper orientation to ensure that the letters are not upside down when fully assembled.
- Grab the level and place it underneath the bench panel. Using the machine, place the laser head at the bottom left corner of the level. When you move the level, make sure the bench moves with it so that the bench is also levelled in the process. Once there, move strictly in the x-direction to the right until it reaches the right end of the level. Line up the bottom right corner of the level to the laser. Once there, make the laser go right once more and repeat the same process until the level is completely levelled.
- Now move the laser to the origin of the bench. Grab the focus stick and ensure the laser head is the appropriate height, with the focus stick being flush with bench. Do the same process for the top left, top middle, top right, bottom left, bottom middle, and bottom right. If at any of the points the stick doesn't touch the bench, this means the bench is not levelled, and you must place the material underneath until the bench is levelled. This step is complete once the bench is properly levelled at each point.
- Position the laser head at the center of the bench. This will be the origin point. Once at the center, set the origin on the laser machine by pressing the origin button. This will ensure that the machines origin aligns with the origin of the RDWorks file.
- In RDWorks, make sure the file is set to cut so the machine makes the outline of the design first. Set the power to 85 and the speed to 1. Plug in the laptop to the machine and download it to the machine by pressing write.
- Close the laser machine, then run the design on the laser machine. Ensure that the air is running to expel the debris from the laser. Wait for the laser machine to finish cutting.
- Once complete, in RDWorks, set the file to scan, set power to 75 and speed to 35, so that the laser machine will cut the inside of the design. Plug in the laptop to the laser machine and download the file once more to the laser machine to override the previous file.
- Run the file in the laser machine 3 times to ensure a clean scan.
- Once the laser machine is complete, remove the bench from the machine. Spray paint the design. It is preferable that the bench does not stay in the laser machine over night so dust and debris do not accumulate on the cut surface of the bench.
- Once fully spray painted, remove the tape from the bench.