
The wiring harness and extension harness have both been made and are being shipped out today. It should arrive in the next few days. Note that the wire colours are a little different, as we did not have the exact same coloured wires.
Before swapping the wires, be sure to turn the machine off, for safety purposes. To remove the old wire harness, you will need to remove the connection at the Y driver. Open the front control panel door to see the two black boxes. You will need to look at the Y black box, which is the box furthest from the front, as shown in the picture below.
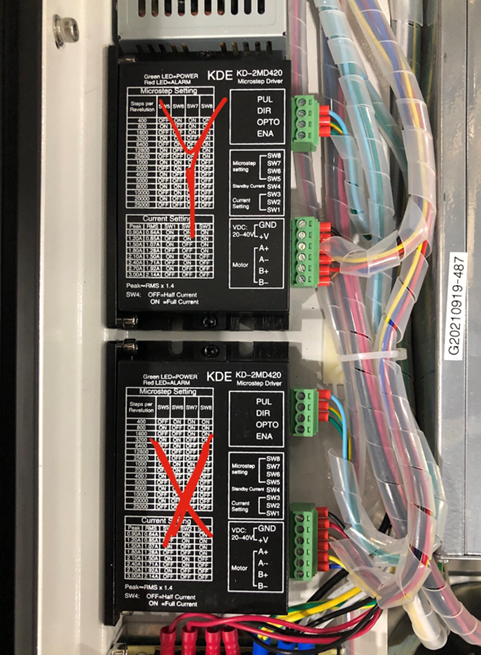
Look closely at the green connector that contains the blue, red, yellow, brown wires. You will need to remove these wires from the green connector by using a screwdriver to loosen the screws on the green connector to be able to remove them. I circled in blue the screws that need to be loosened, in the picture below.

Once these are removed, you can now remove the old wires. This might take longer, as the wires are in the same plastic harness as others. Once this is done, remove the wires from the hole as well shown in the picture below. The old wires should now no longer be in the system.

Now, you may feed the new wiring harness through the hole in the place of where the old wiring harness was. The new wire colour order from top to bottom will be: Burgundy, Red, Yellow/green, and Blue. Put these in where the old wires were that were removed previously from the green connector on the black box.

Feed the new wiring through the hole, and it should now be complete.