The next troubleshooting steps will be to troubleshoot the controller to test to see if the controller is faulty.
First, we will go into the controller in the back of the machine. When you get to the controller, you will swap the CN5 and CN6 green connectors.
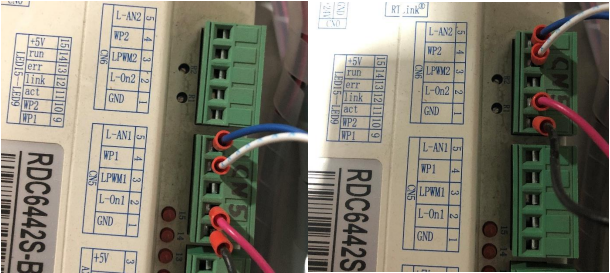
On the left is what is should look like before the swap. The right image is what is should look like after the green connector swap.
The next step will be to use the RDWorks program to communicate with the machine. First, be sure you have a USB to USB cable to plug it into your AP Lazer laptop.
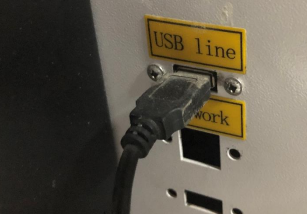
The other end of the USB cable should be plugged into the USB Line port on your machine.
Once plugged in, find the RDWorks program on your laptop and open it. You can either click the icon for RDWorks or search for it in the search bar. When you click the program, be sure to press yes to the window that pops up.

You can either find the icon on the desktop, or use the magnifying glass to find the program.
Once the program is open, go to the vendor settings located in the File tab located in the top left of the window.
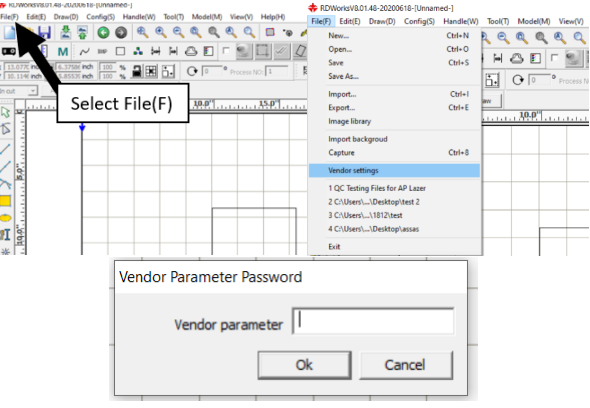
Go into vendor settings, and it will ask you for a password. The password is "rd8888".
The next step will be to turn on your machine with the laptop plugged in. Read the machine settings by clicking the "read" button. Once this is done, be sure to click the "Laser" tab. Make sure that the "Multi tube" option is selected.
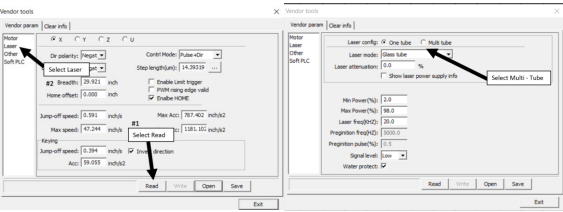
Once the "read" button is clicked, the blue bars should fill up completely.
The last step will be to press the "write" button to send the setting change to the machine.
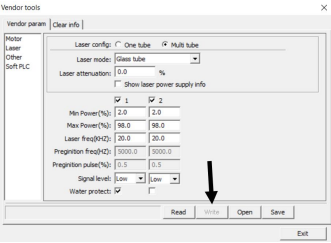
Once the "write" button is clicked, wait for the blue bar to fill up. Once filled, you may close the "Vendor tools" window.
Once this is complete, put tape on the front of the tube once more, and press the pulse button to see if the laser fires. If the laser does fire, then this means the CN5 function in the controller is faulty. If the laser still does not fire, then more troubleshooting steps will be required.