To adjust backlash setting you will need to be connected to the machine and have the power on. You will also need to have something that you will be able to run tests on. Recommended using black granite, manilla file folder, or black poster board.
Step one: Open LC and use the rectangle tool on the left-hand side tool bar to draw a rectangle

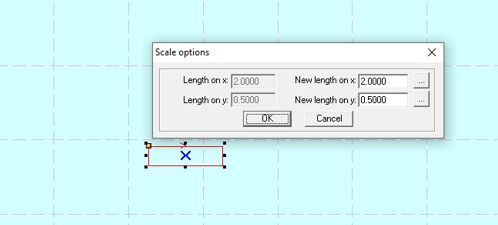
Press CTRL G to bring up your scaling options and adjust the size to 2 x .5
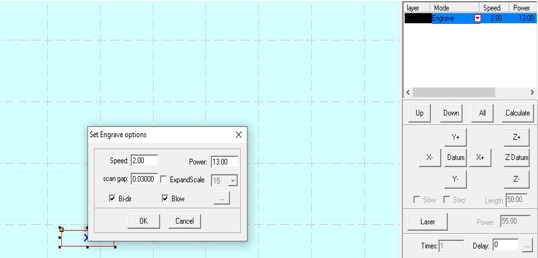
Step three: Set your mode to engrave and adjust your settings to speed 2 power 13 (can vary) and scan gap .03
Step four: Download and run sample. Bellow are samples of good backlash vs bad backlash.
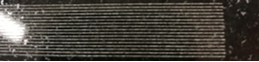
Good backlash - Lines are straight

Bad backlash - Lines are uneven
What you are looking at and for is how the laser is engraving from left to right and the laser shifts on the y axis to then engrave right to left that the lines are straight and even on the sides. If they are not, then you will need to adjust the backlash settings in the machine options. You can access the machines options by either going to File>Machine options>Engrave or CTRL J > Machine options>engrave. You will need to double click the ACC space to bring up your engrave options. See picture bellow
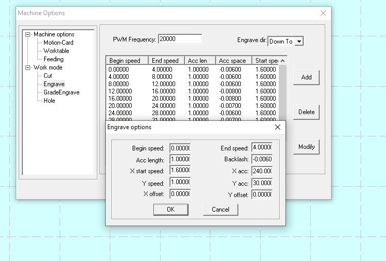
The test speed value is going to be the middle number based on the begin and end speed so for example the 2 speed test will be adjusted under the Begin speed 0 and End speed 4. Adjust the backlash setting either up or down. Click Ok>Save>Ok>Download>Del ALL>Download CFG (Make sure both lids are closed)> Download current> run test.
Once everything is adjusted and correct you will move on to the next speed test. Speed will increase by 4 on each test speed. You will need to test at the following speeds 2, 6, 10, 14, 18, 22, 26, 30, 34, 38, and 42